We arrived today at the final stages of finishing a custom made beaver felt fedora hat with Stephen Temkin of Leon Drexler hats in Toronto, Canada. In the final stages you will see the attaching of the binding, fitting that binding, tacking the edge, attaching the French silk ribbon and bow tie to the hat and finally the finishing of the lining. If you would like Stephen to make your next hat, contact him here: LEON DREXLER
17:
Attaching the Binding to the Curl
The
ribbon binding for the curl is carefully fitted, the two ends sewn together to
form the rear seam, and then basted by hand to the inside of the curl before
being securely stitched by machine. Here, the sewing is complete and the
whip-stitched basting thread will now be removed. When the binding is turned
out, the seam will be completely hidden on both sides.
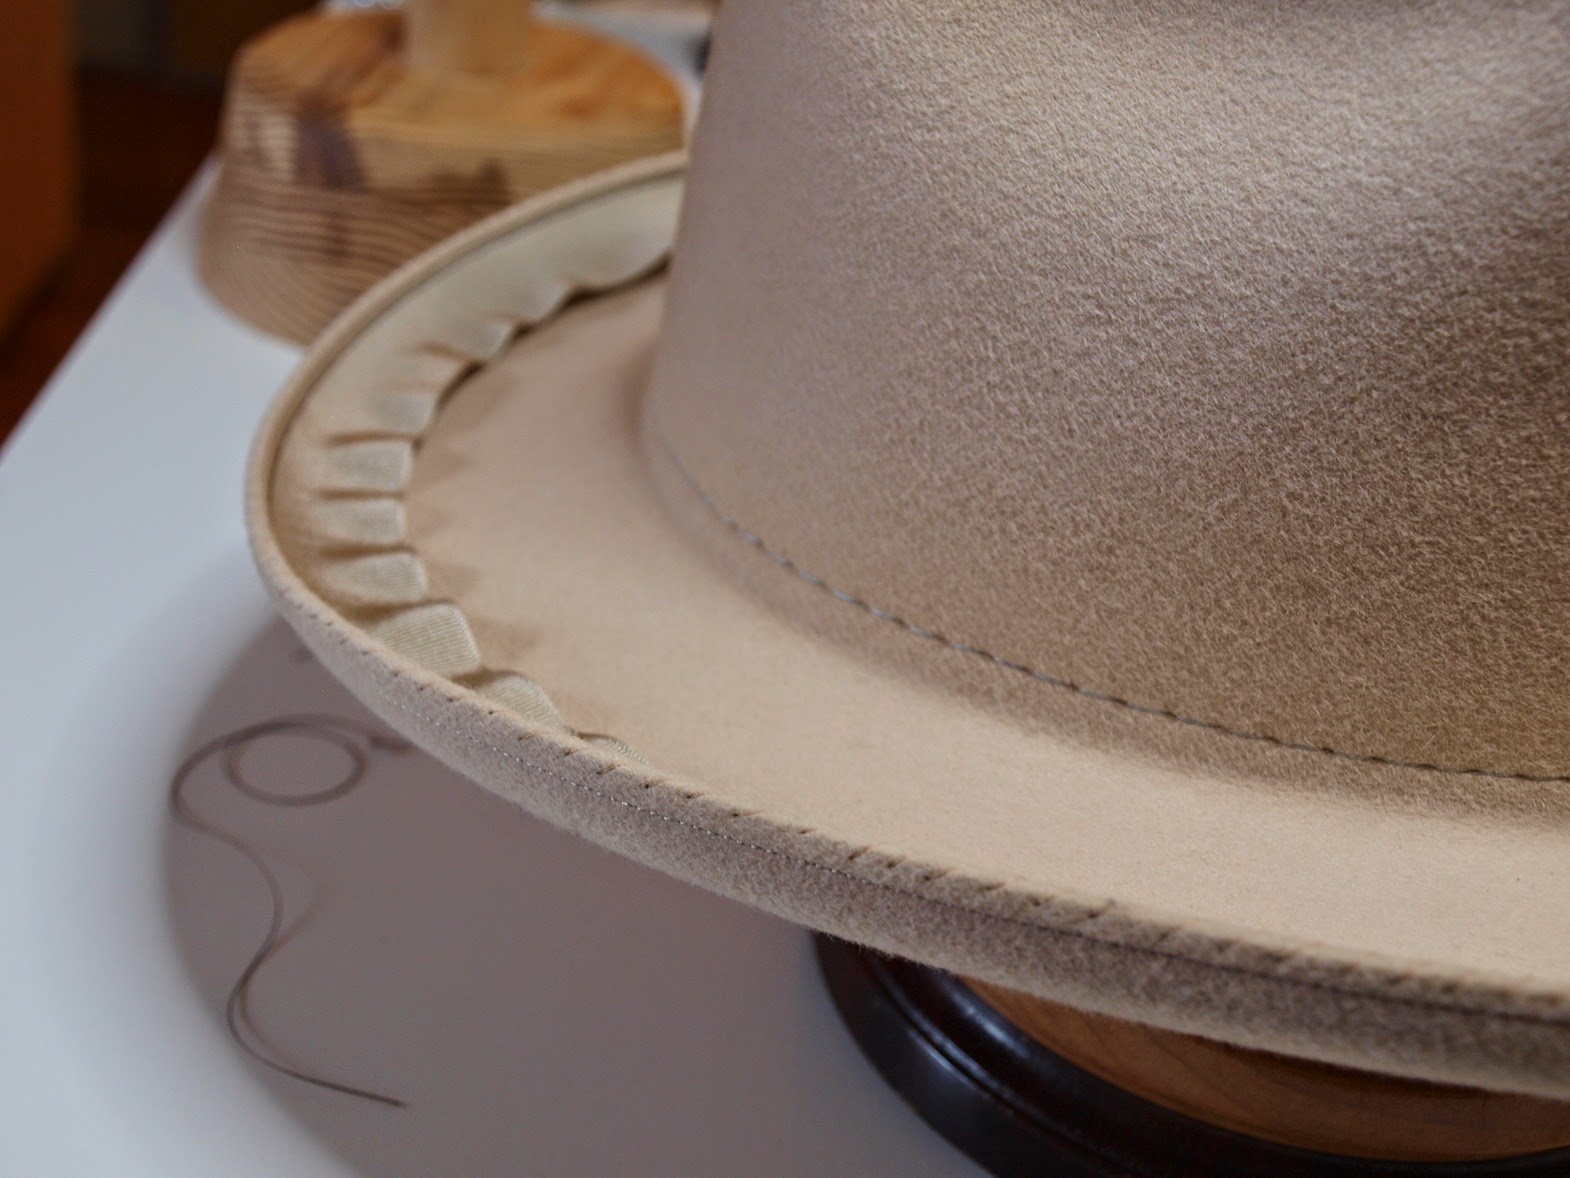
18:
The Fitted Binding
When
turned out, the binding snugly conforms to the curl and an elegant piping
effect trims the inside edge. Tension in the binding has also pulled up the
curl as intended, especially on the sides. The hat will now go back to the
steamer to make some adjustments to the overall shape of the brim.
19:
Tacking the Binding's Edge
Next,
the bottom edge of the binding is tacked by hand to the felt with a series of
tiny discreet stitches just a few millimetres apart—somewhere around 150
stitches overall for a hat of this size. This takes pretty much forever, but
the result is a stable, elegantly tailored binding with no visible stitch line.

20:
Ribbon and Bow
The
crown is now trimmed. For this hat, a wide, dark, rich blue ribbon was selected
from Leon Drexler's substantial collection of decades-old French grosgrain. The
band and bow are separate pieces, invisibly tacked to the crown with matching
filament silk thread. For this hat, the bow is simple and classic.

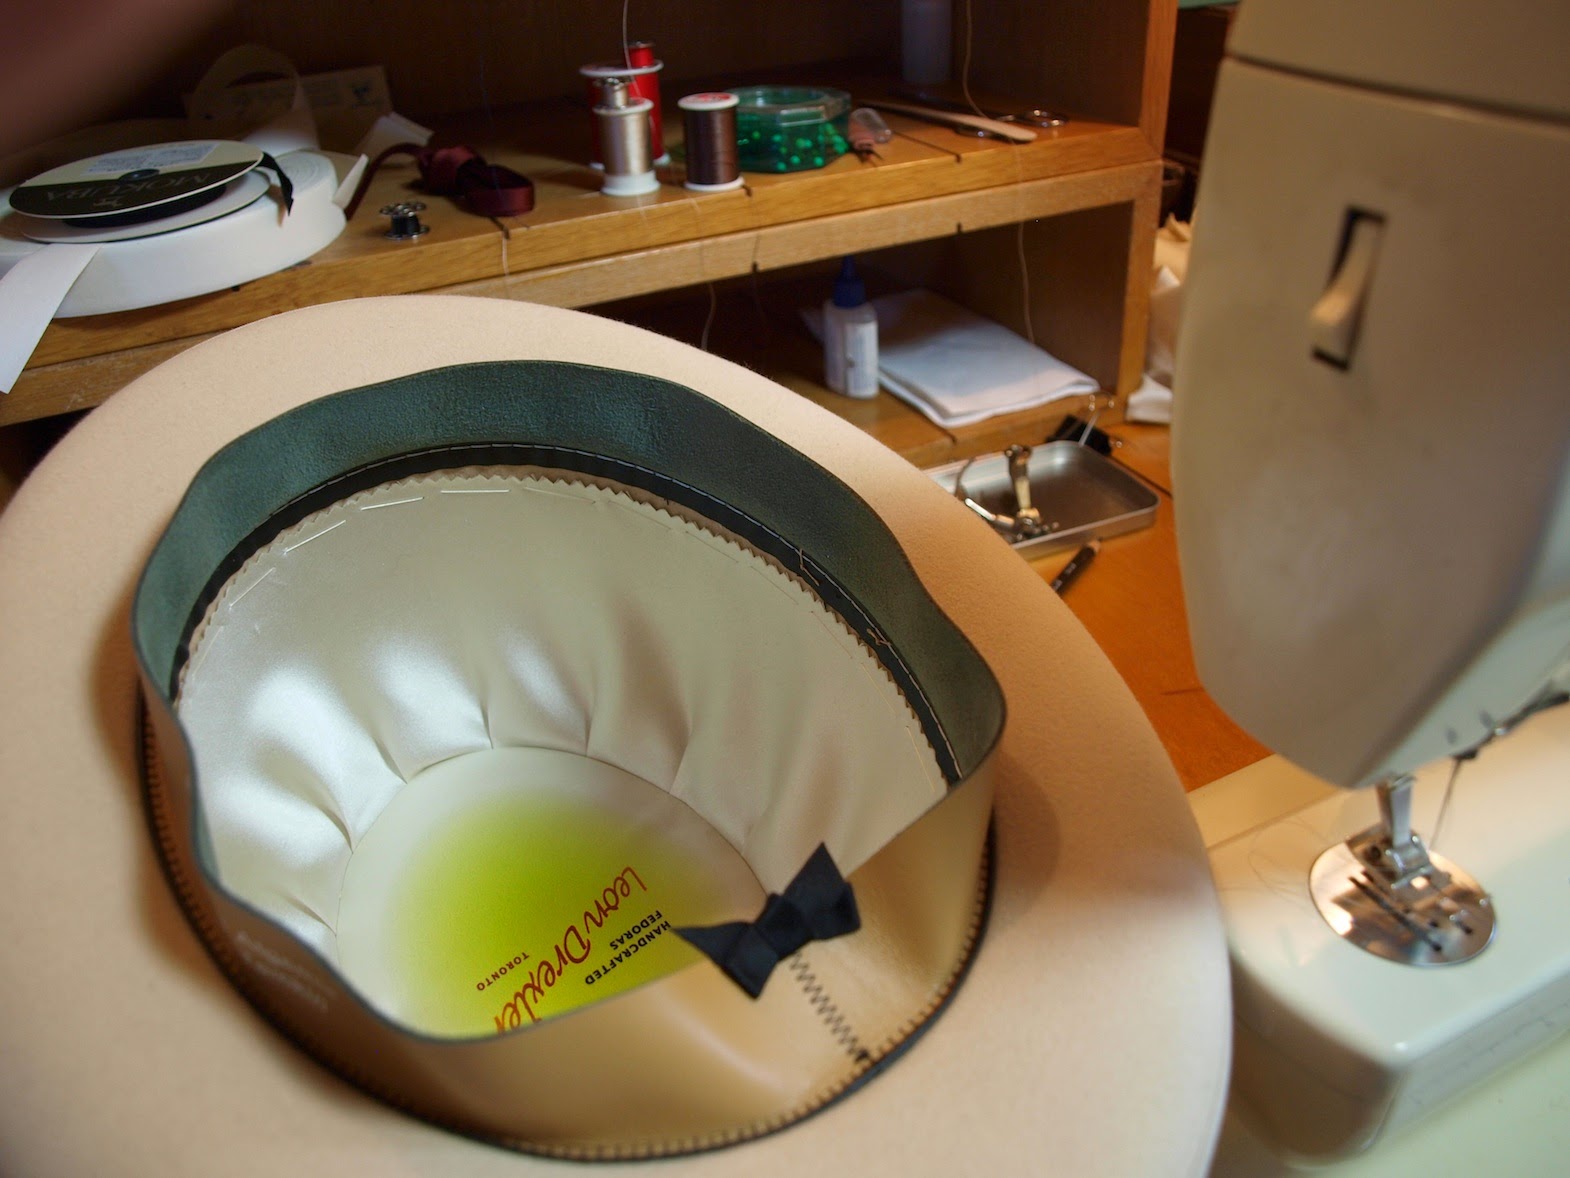
21:
Making the Lining
Leon
Drexler linings are made from high-quality silk duchesse and individually
tailored for each hat. The dressy character of this hat will be complemented by
the nifty detail of a pleated lining. In this photo, a piece of silk has been
sewn with a pleated edge and is now being fitted to the inside of the crown.
The oval template is used to size the upper crown portion of the lining; it
will be cut from another piece of silk which is printed with the Drexler logo.

22:
Lining Installed
Once
the lining is sewn and the excess material trimmed away, it is secured to the
inside of the crown with a line of basting stitches. Finally, a small silk bow
is sewn to the back of the sweatband. Now, it's back to the steamer one last
time for a final touch-up.
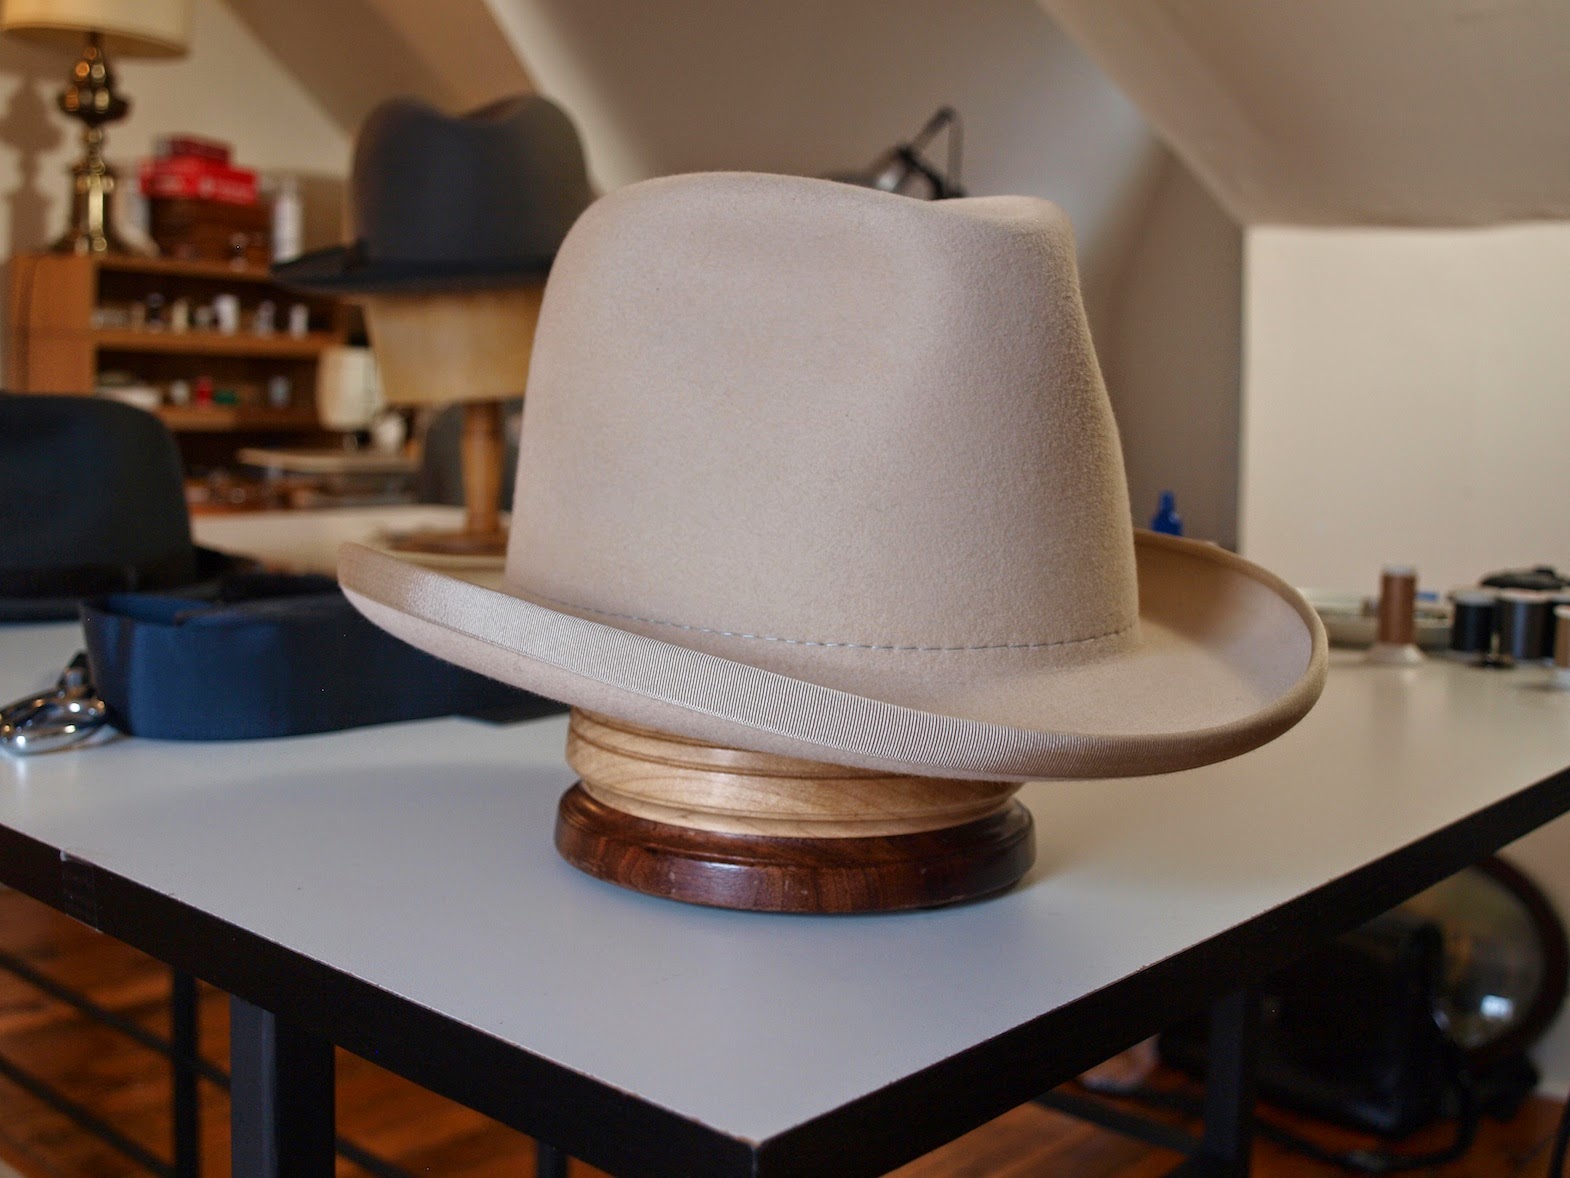
23:
The Finished Hat
Et
voila! A hat of classic style and construction is ready to meet the street.

No comments:
Post a Comment